HiPhyEngine Blender Quick Start#
System Requirement#
HiPhyEngine supports Windows and Linux. It requires an x64 CPU with AVX2 support. Any Intel/AMD CPU from last decade should be enough.
Install Addon#
HiPhyEngine can be installed through the add on menu(edit->preferences->Add-ons)
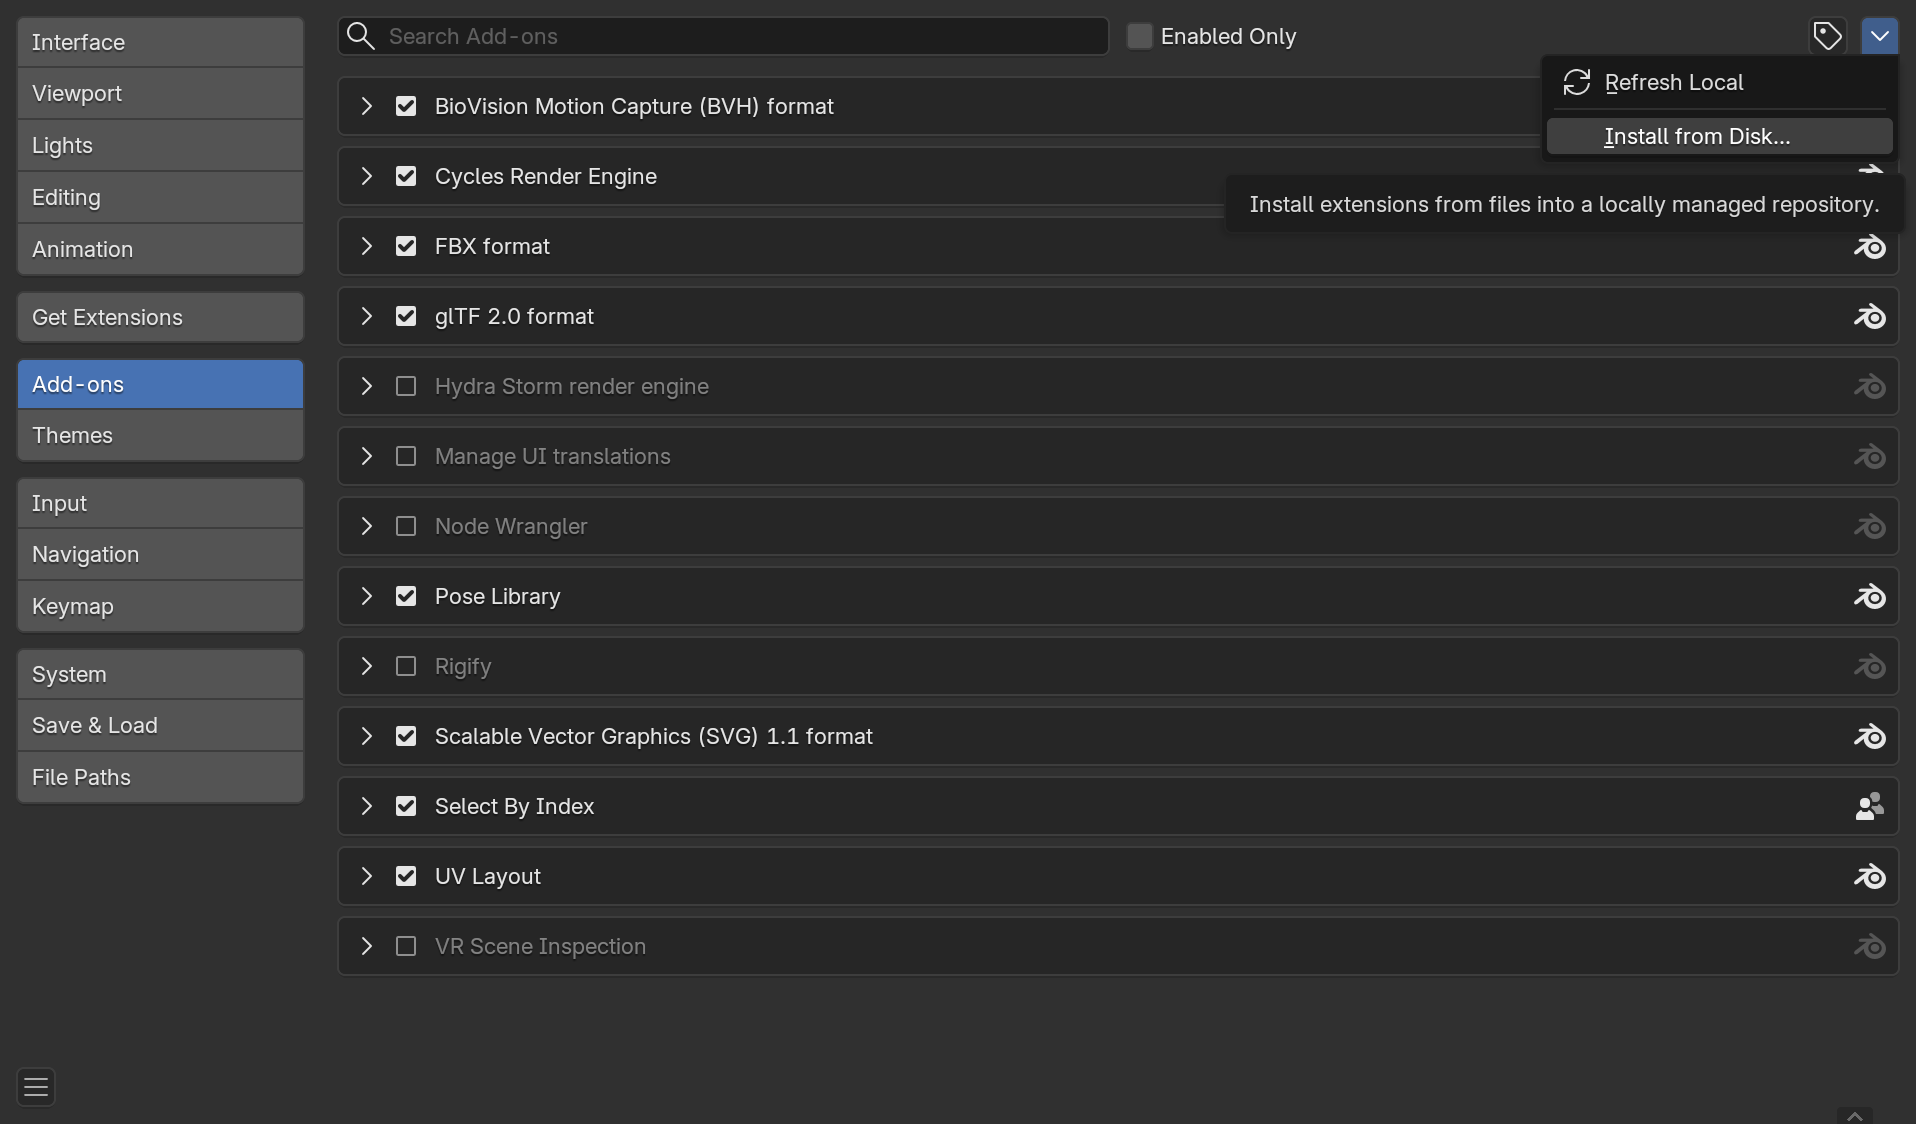
For the first time HiPhyEngine is loaded, it will automatically install its dependancy Intel's MKL and PyBind11 using pip or wheels. Blender's python manages its own environment, and those packages will be installed in Blender's python environment. Due to those installations, the first time loading HiPhyEngine can take a seconds to a few minutes depending on the network connection. User can check the download progress on the terminal/console.
Note
HiPhyEngine is currently complying to the VFX2025 standard. Specifically, Python 3.11. It is comes with Blender 4.5+.
Creating Your First Simulation Setup#
In this section, we will show user how to set up a simple rigid body (affine body) simulation.
After insallation, HiPhy panel will show in the physics menu.
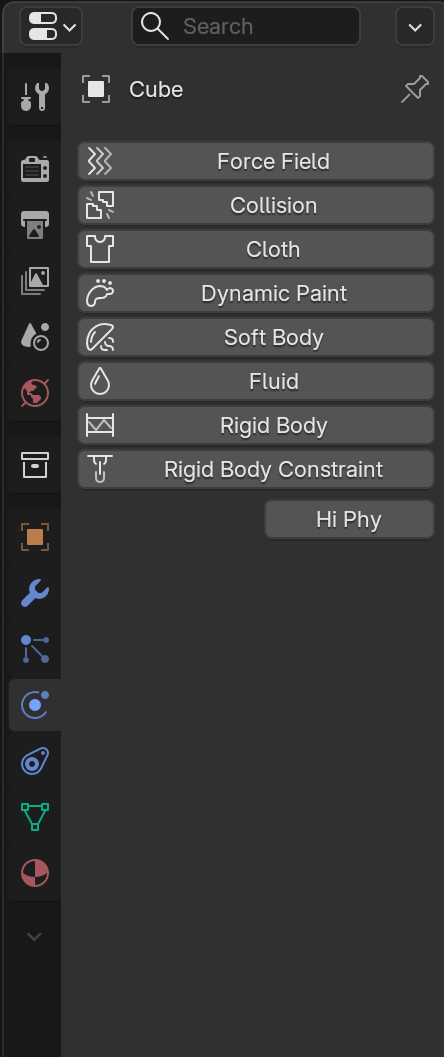
By checking Hi Phy, it enables HiPhyEngine on the selected object.
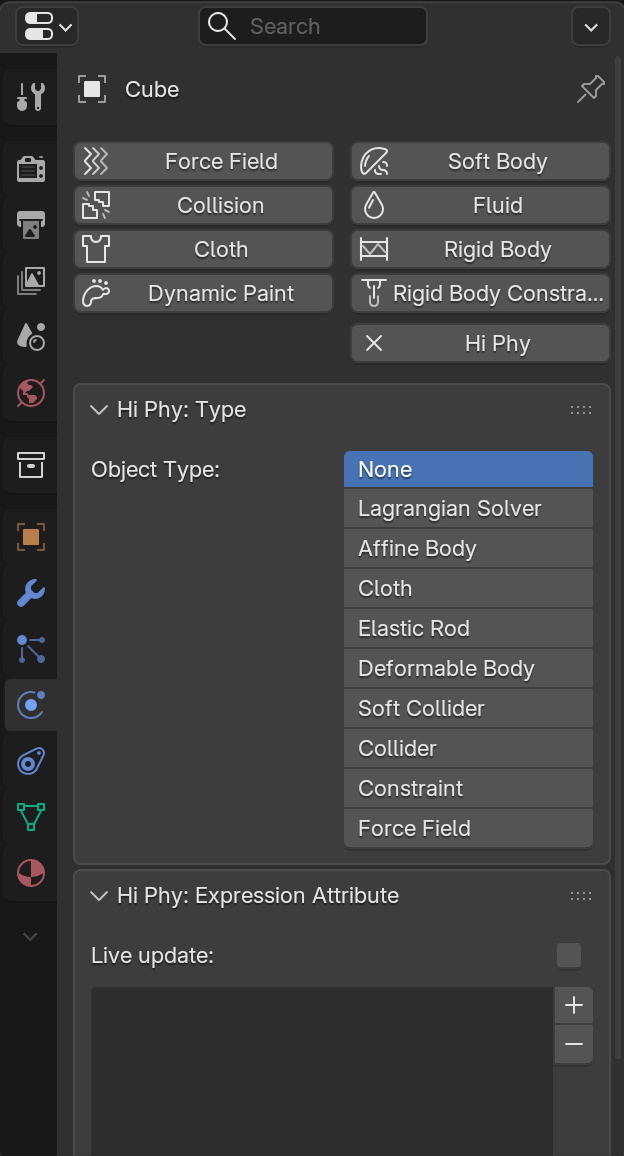
The panel lists the different supported materials and nodes for HiPhyEngine. For this tutorial, we will use the Lagrangian Solver, Affine Body, and Collider.
Creating Affine Bodies#
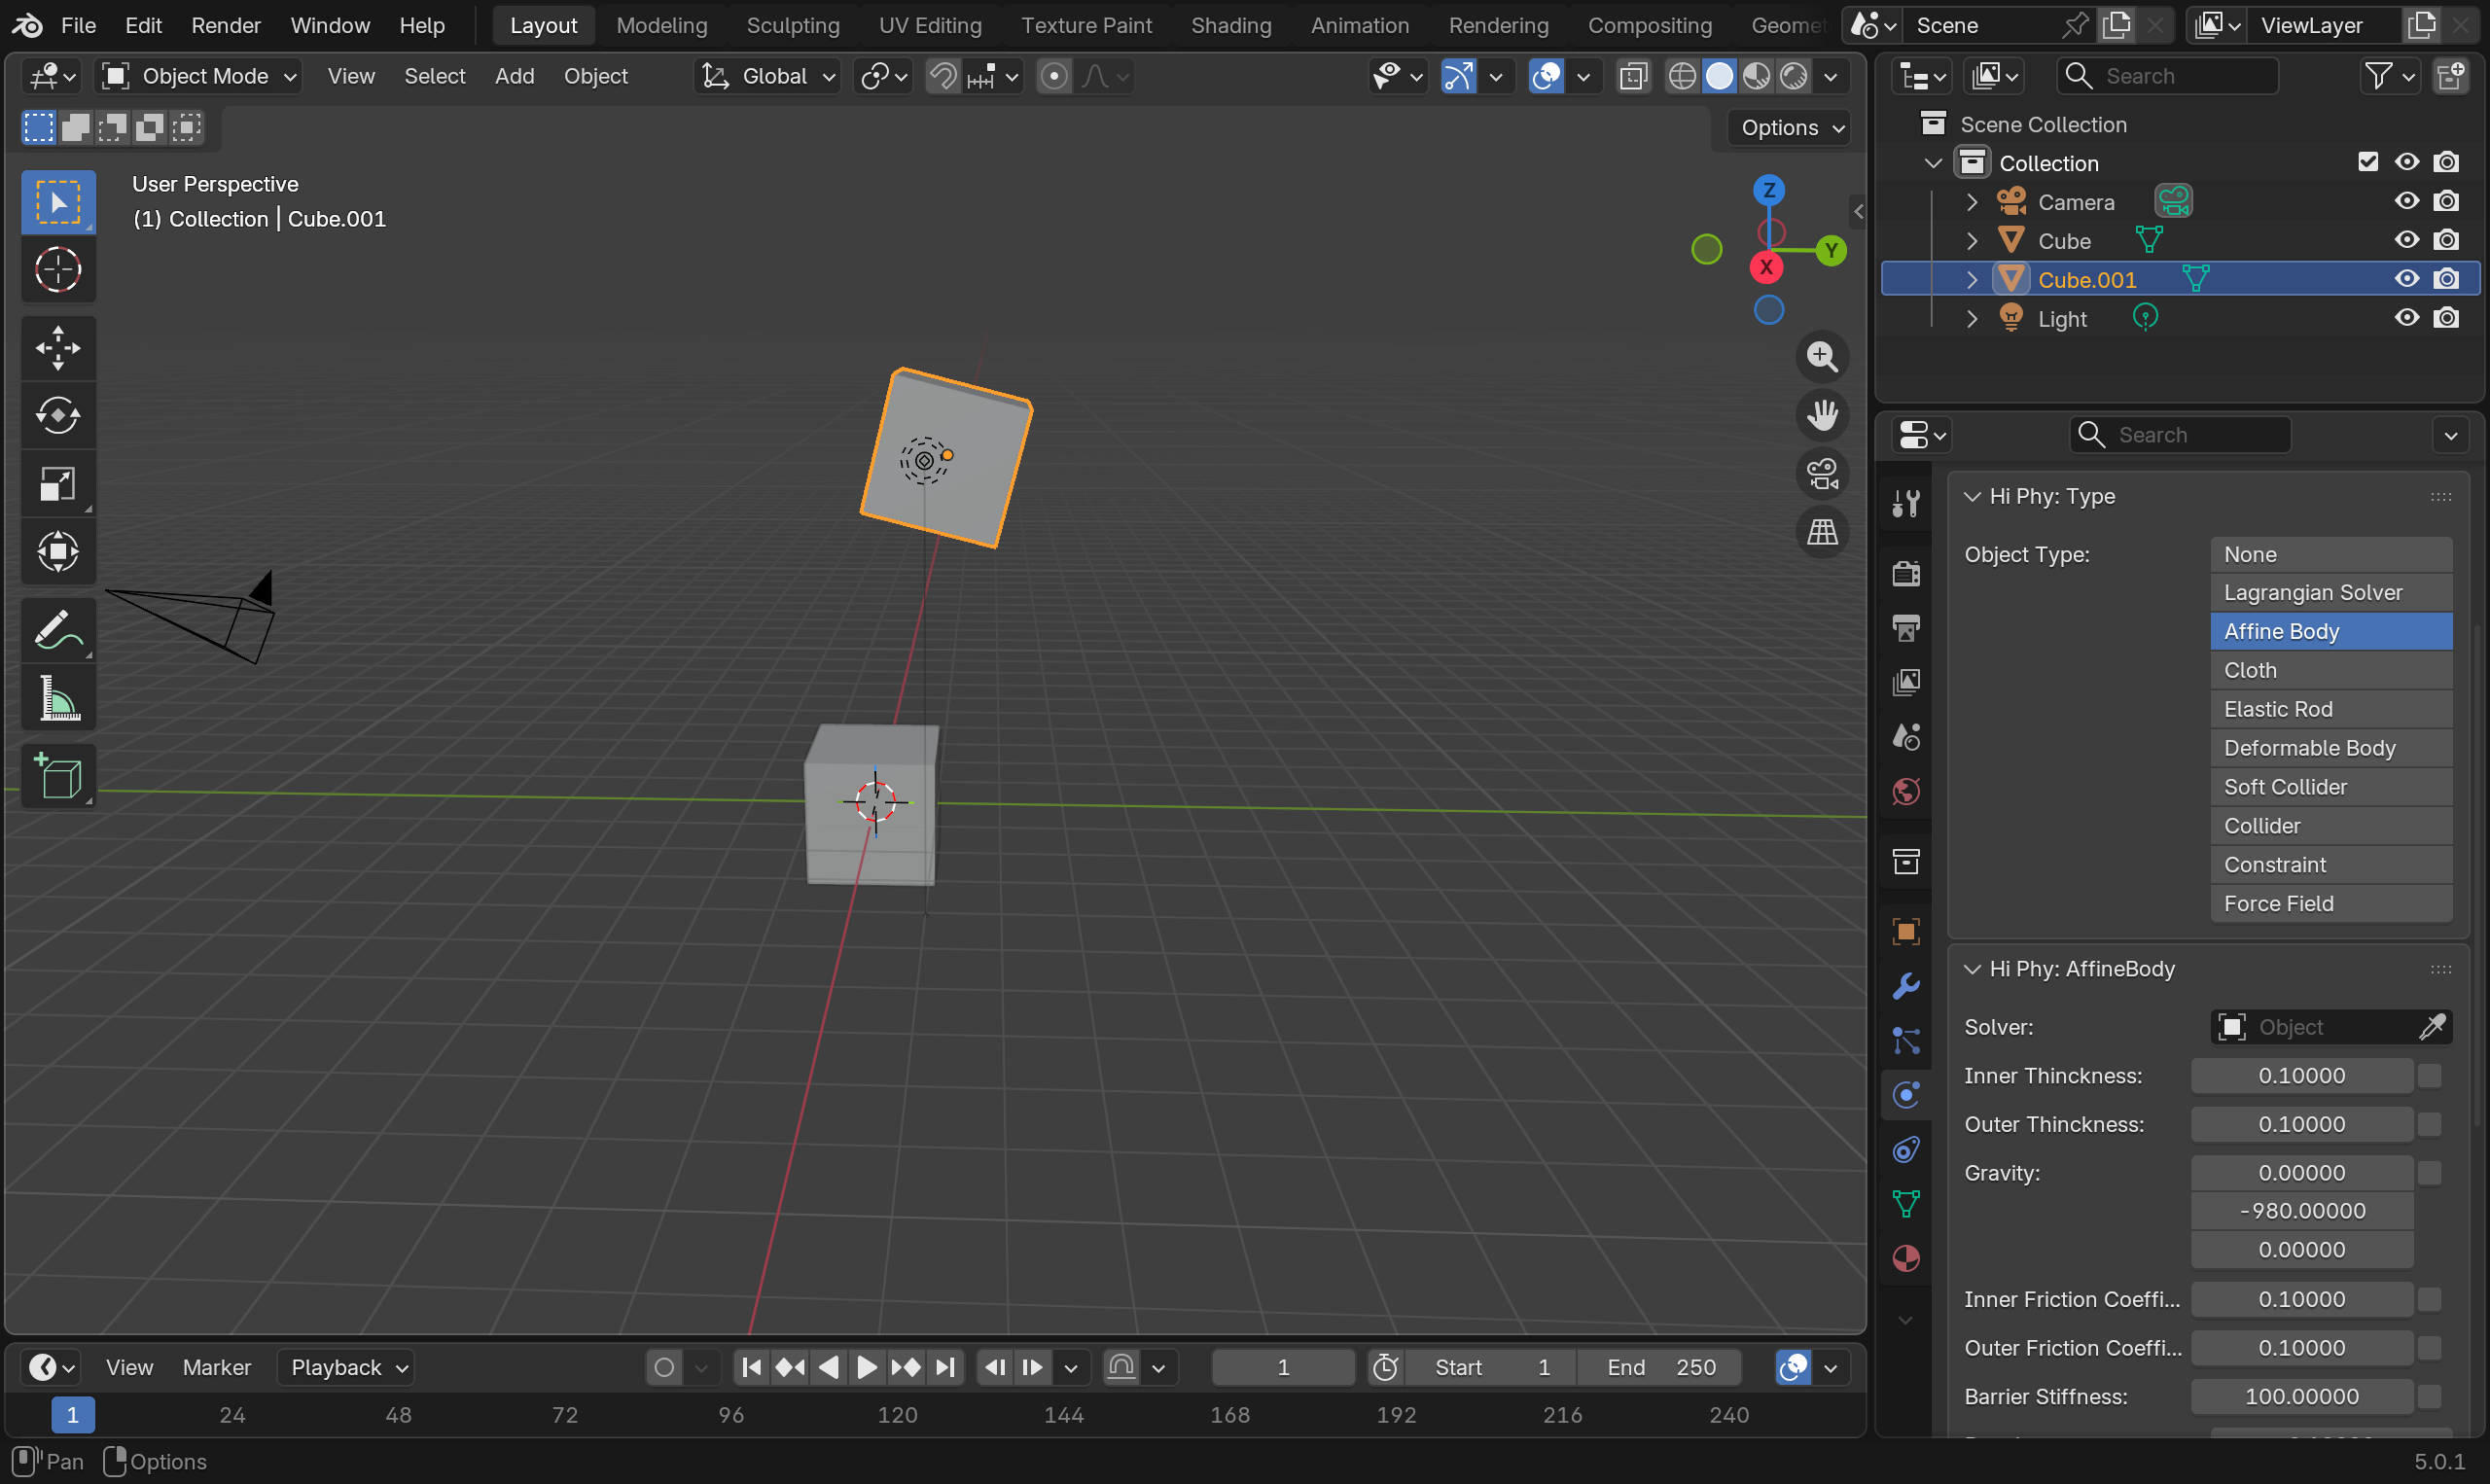
Create two cubes and places them above each other for some interesting collision.
Enable Hi Phy in the Physics panel and select Affine Body as the material model.
Note
Affine Bodies are material models for simulating very stiff objects. From the simulator's perspective, they are preferred over rigid bodies for their mathematical properties. For the purpose of simulation setup, they can be treat as rigid bodies without differentiation.
In the Modifiers panel, add a Triangulate modifier to both cubes. Check the Keep Normals option to ensure the normals are preserved by the triangulation.
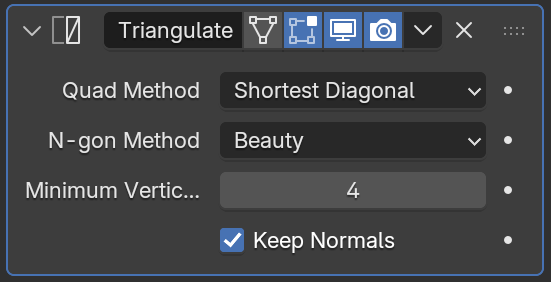
Note
All meshes in HiPhyEngine simulation must be triangle meshes. To ensure maximum transparency, HiPhyEngine does not perform any internal triangulation, so the simulation mesh will always matches what is in the scene.
Also change the Gravity property on the affine bodies from [0, -980, 0] to [0, 0, -980].
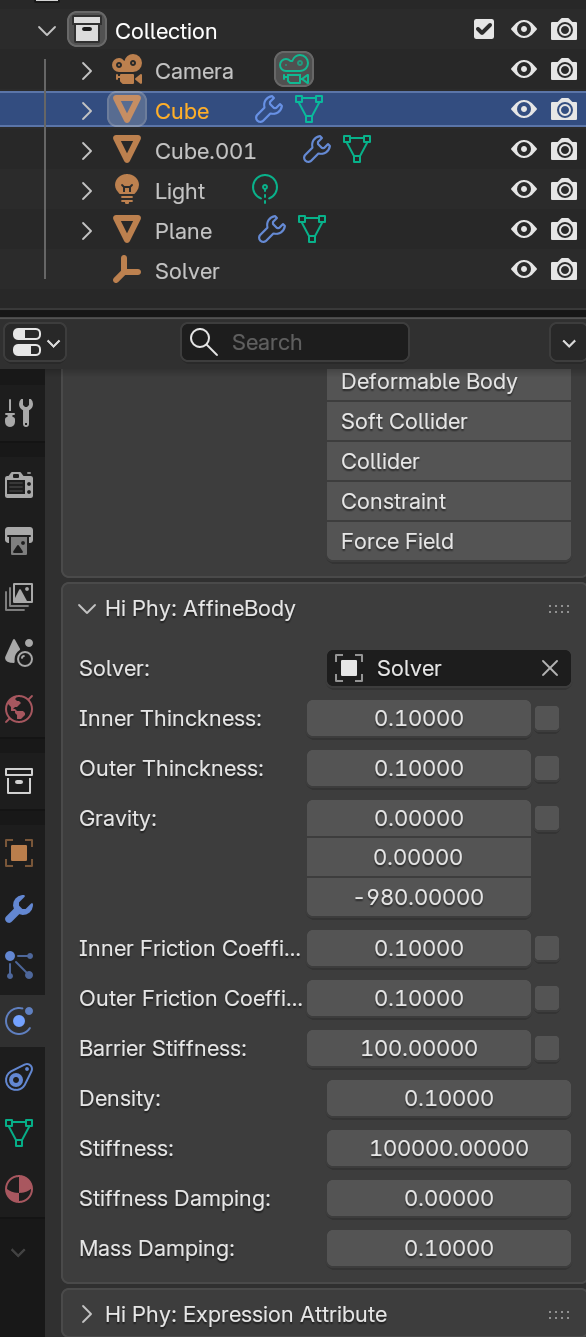
z-up vs y-up
HiPhyEngine is generally coordinate system agnostic, besides the Gravity property. Even though Blender is default z-up, we choose to be y-up to be consistent with industry standard to make it easier working with assets from other packages.
Unit
The unit of length in HiPhyEngine is cm. There is a Solver Scale property on the solver node for convert units if the scene unit is not cm.
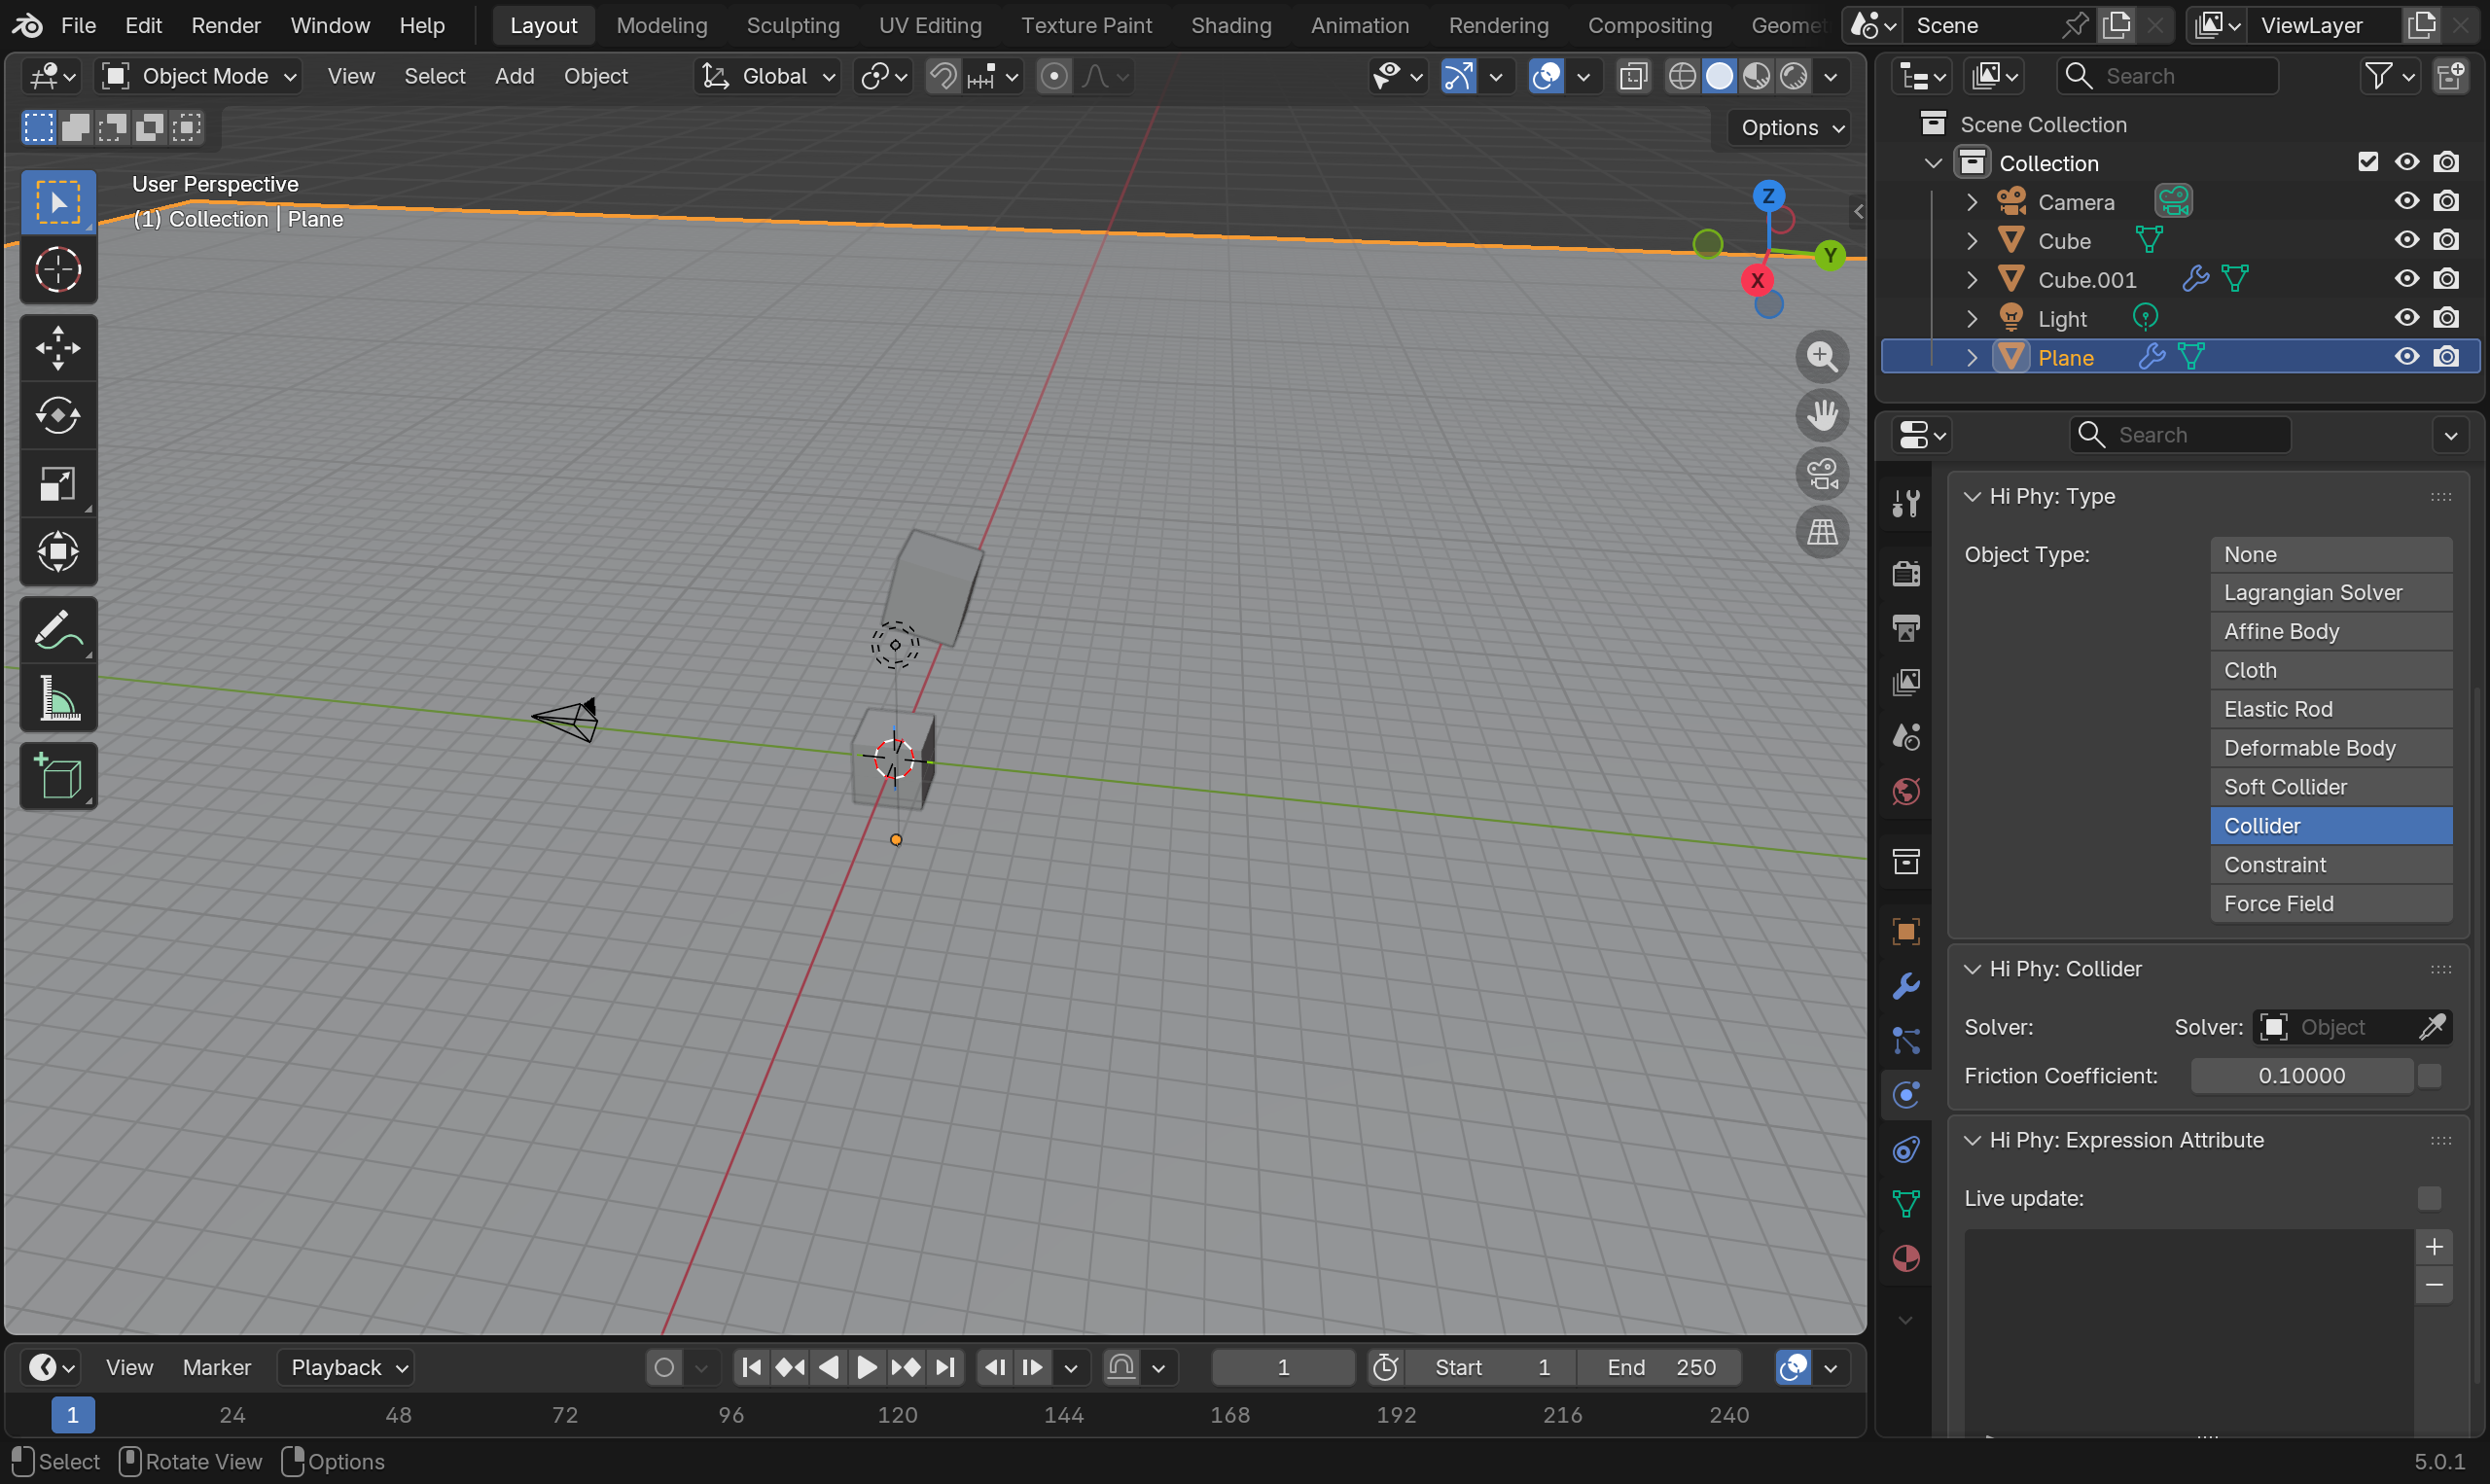
Creating A Collider#
Create a plane and scale it up and move it below the cubes. Enable Hi Phy and select Collider. Don't forget to triangulate it as well.
Creating A Solver#
A solver node is in charge of gathering the information of all the simulation objects connected to the solver, running the simulation and maintaining the cache for simulation.
Create an empty plane axis (or any invisible object you prefer). Enable Hi Phy and select Lagrangian Solver.
Connect Objects To the Solver#
The last thing you need to do, is to connect the simulation objects to the solver.
In the Hi Phy panel, assign the solver node to the Solver property for the two affine bodies and the collider.
Running The Simulation#
Click the Run Sim button on the solver node's Hi Phy panel, the simulation will be kicked off asynchronously. You can see the progress of the simulation under the Run Sim button.
You can change the frames on the timeline. The simulation meshes will be updated with frame change when the simulation frames are available.
Congratulation on your first HiPhy simulation!
You can find the reference file here