Tailor Dress#
HiPhyEngine Version
This tutorial requires HiPhyEngine v1.2.0 and above.
In this example, you will learn how to HiPhyEngine to tailor a simple dress. We assume you have already learned how to convert edges to constraints from the previous shirt tailoring tutorial.
The key focus of the tutorial is the using the rest scale, to create elastic band for the dress waist and shoulder.
In the tutorial, we will also show some of the issues that came up with rendering with subdivision surfaces, while simulating with a lower resolution mesh, and how to fix those issues.
You can find the video of how to create the dress pattern here.
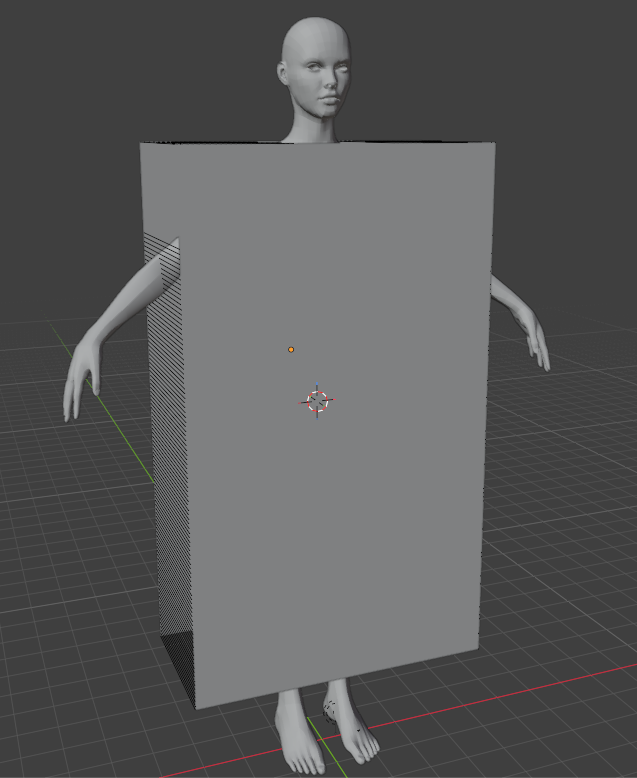
We will start with the Blender file here. The file already contains the cut patterns, we will only demonstrate how to use HiPHyEngine to tailor the cloth. This scene is in \(cm\) unit.
T pose vs A pose
The model used here is in an A pose. T pose is the better choice in most cases as it makes it easier for the sleeves to fit around the shoulder. However, in this example, the A pose is good enough.
Step 1: Setup Solver#
-
Create an empty plane axis, rename it solver, goto the physics panel, turn on HiPhy, select Lagrangian Solver
-
Change the Newton tolerance to 2. (2 is enough for this example)
-
Change the CG tolerance to 3. (3 is enough for this example)
-
Change the End Frame to 100.
Step 2: Setup Collider#
-
Select female-base
-
Add a Triangulate modifier and check the Keep Normals.
-
Goto the physics panel, turn on HiPhy, select Collider
-
Choose the solver object for the Solver parameter.
-
Set inner thickness to 0.1 (1mm).
-
Set outer thickness to 0.25 (2.5mm).
Step 2: Setup Cloth#
The cloth simulation mesh is pre-provided as Fabric.Fit. Though the simulation parameters has not been setup yet.
To use the UV panel model, user will need to provide the hiphy_cloth_uv attribute. However, the cloth panel is perfectly flat and therefore we can directly use the local coordinate the cloth panel to the hiphy_cloth_uv attribute, by using a simple geometry node.
- Adding the following geometry node
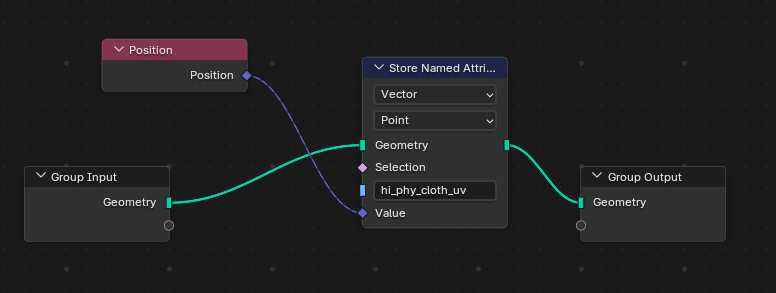
-
Add a Triangulate modifier and check the Keep Normals.
-
Goto the physics panel, turn on HiPhy, select Cloth
-
Choose the solver object for the Solver parameter.
-
Set Density to 0.005. (The dress will be a lighter material)
Step 3: Setup Constraints (stitches)#
-
Select Fabric.Fit goto Edit, right click->attribute->HiPhy Constraints->HiPhy Convert Edges to Binding Constraints.
-
Check Override Restlength and Set the rest length to 0.02 (0.2mm).
-
Rename the newly created constraint object to stitches
Step 4: Animate Constraints#
If you run the simulation now, it will fail due to how fast the constraints are pulling the fabric onto the body. To allow the fabric to stitch in a more physically correct way, we will need to animate the constraints and parameters.
The animation will be in two stages: stitching and dripping. In the stitching stage, we will not have any gravity, only the stitching pulling the fabric together. In the dripping stage, gravity will be added, and let the cloth reach equilibrium.
-
Key Fabric.Fit's Gravity to (0, 0, 0) from frame 0 and (0, 0, -980) at frame 50.
-
Key compression stiffness and stretch stiffness of the two stitch constraints to 0 to 10000 from frame 0 to 50 then 100000 at frame 60.
That's it! Once you ran the simulation you will see the dress stitches together!
Long animation
The reason we need to have a longer animation for stitches here, is because we are having an A pose. We need the dress to drip slightly, so the sleeve hole will form around the arm properly. If your character started with a T pose. It will be a lot easier.
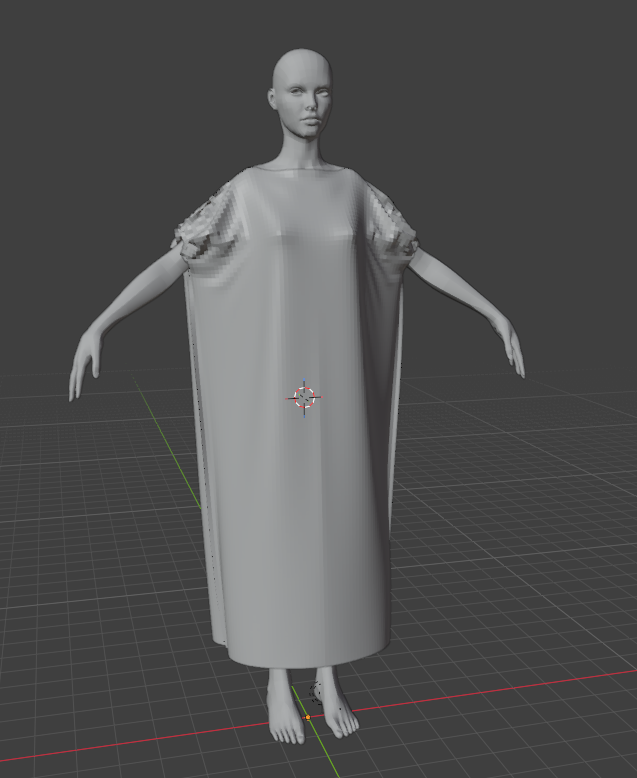
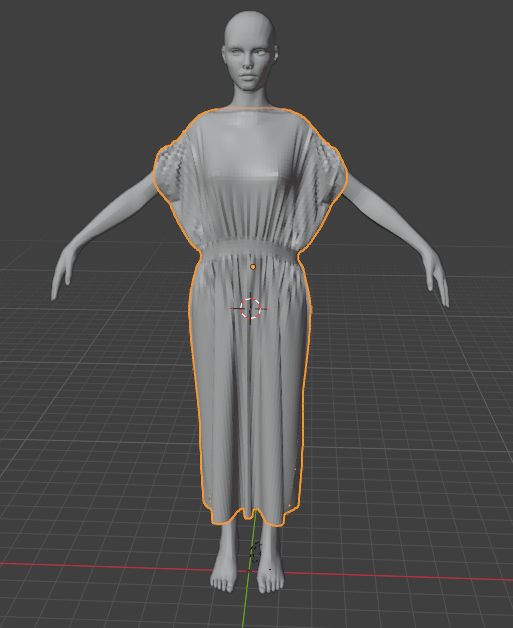
There is an obvious issue that the cloth has no waist band to hold its shape. We will add that next.
Step 5: Using Rest Scale to create elastic bands.#
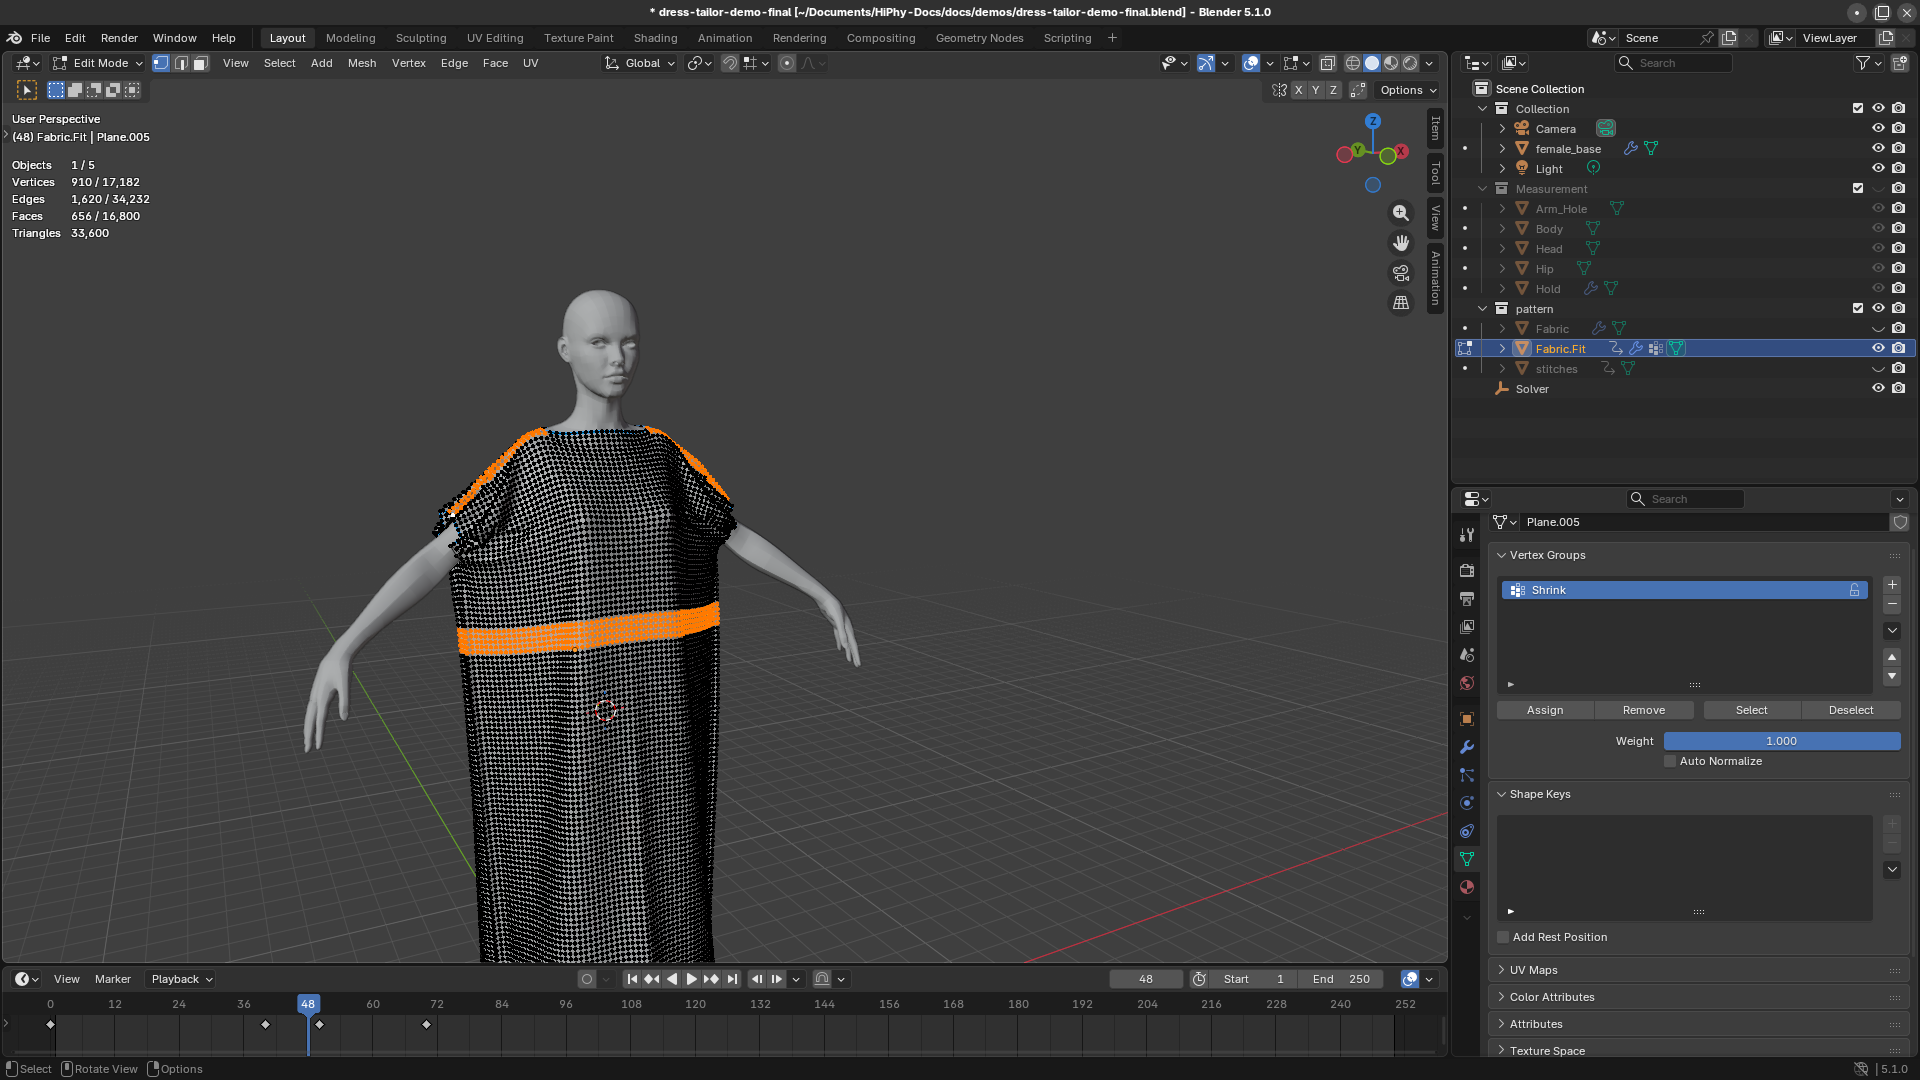
We have already created a vertex group named Shrink that indicates the vertices that belongs to the elastic band.
In this step, we will convert the vertex group to an animated attribute to be used by HiPhyEngine.
- Adding the following geometry node to Fabric.Fit. It creates a new attribute hi_phy_rest_scale
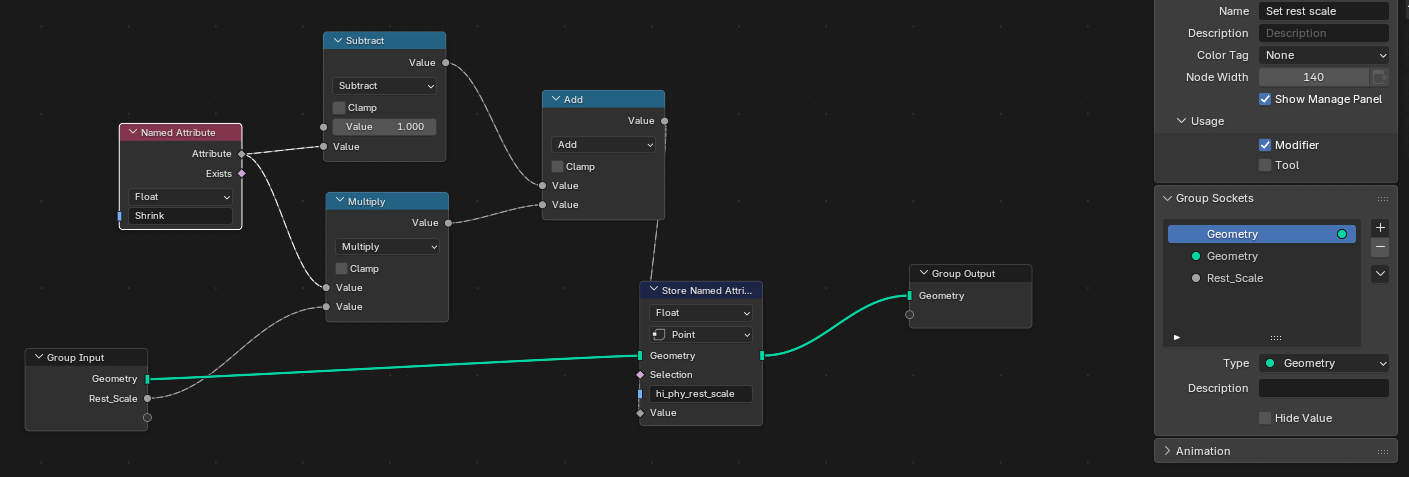
vertex group and attribute
Vertex group in Blender is a weight attribute. HiPhyEngine doesn't directly use vertex groups as maps. It is so that user can use the power of the geometry node to combine and manipulate the weights themselves, instead of restricting it to one fixed weight map per attribute.
-
Key the Rest Scale on the geometry node at 1.0 from frame 40, to 0.5 to frame 60.
-
Goto the Hi Phy panel and check the box to the right and use hi_phy_rest_scale for Rest Scale U.

Rest Scale U/V
The UV panel model allows stretch/shrink each direction separately. In this case, we only want to shrink the U (horizontal) direction, but not the vertical direction.
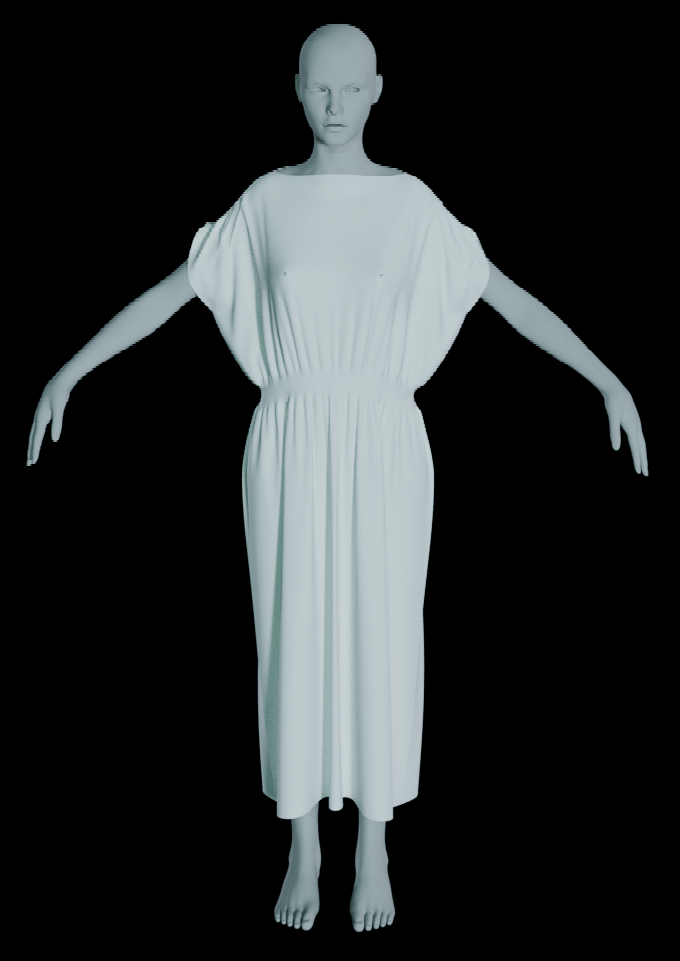
Run the simulation again, and you will now see the marked vertices shrinks and created the band effect.
Step 5: Setup Modifiers for rendering#
The simulated resolution is not high enough for rendering. We need to add subdivision surfaces for rendering.
-
Add a Subdivision Surface and Solidify to Fabric.Fit. Turn off realtime update for the two modifiers. Turn off render for the Triangulation modifier.
-
Set a Thickness to 0.05, and offset to 0 on the Solidify modifier.
-
Add a Subdivision Surface to female_base. Turn off realtime update for the Subdivision Surface modifiers. Turn off render for the Triangulation modifier.
Triangulation and Subdivision Surface
We only need triangulation for the simulation (simulation exports the mesh from the viewport), while still using the quad mesh for rendering. This is trick to use for a simple setup that allows using a single object for both simulation and rendering.
If you render now, you will notice there is a problem. Despite of that the simulation is clean, the subdivision surfaces caused the mesh to poke through.
To fix this, we will need to increase the collision radius to ensure there is enough separation between the cloth and body.
Step 6: Fix Poke Through#
-
Select female-base
-
Set outer thickness to 0.5 (5mm) from 0.25.
Run the simulation again, now the poke through has been fixed.
HiPhyEngine Collision Handling
Even though HiPhyEngine guarantees intersection free of the simulation mesh, thin collision radius will still cause trouble for rendering, because of the issue above. So it is still recommended to have a reasonable thickness, especially areas that the collision object is pointy.
The final Blender file can be found here.