MPM Snow Simulation#
In this example, you will learn how to quickly set up a MPM particle HiPhyEngine simulation in blender.
Step 1: Create Point Particles#
-
We will start with an empty scene. Import the mesh you like, in this example, we will use Add->Mesh->Monkey. HiPhyEngine's internal unit is cm. The solver scale parameter can be used to convert between the scene unit and solver unit. However, in this example, we will stick with the cm scene. Scale up the monkey head mesh by 10. This will create a bundle of snow about 20 cm x 20 cm x 20 cm by size. Rename the mesh to meshless_particles.
-
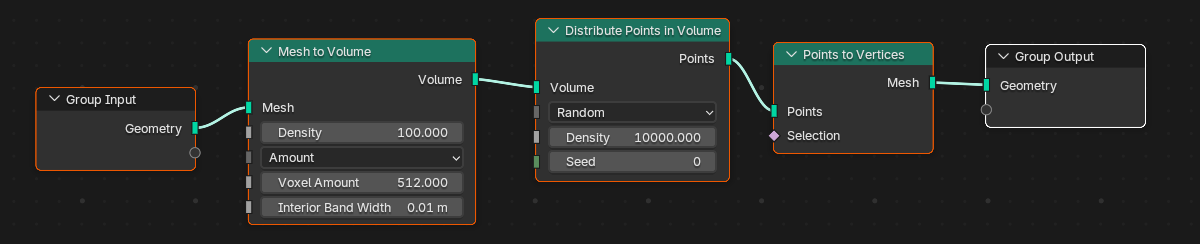
Create a geometry node on the mesh with the following connection: Mesh To Volume->Distribute Points In Volume->Points to Vertices.
Step 2: Setup Collider#
-
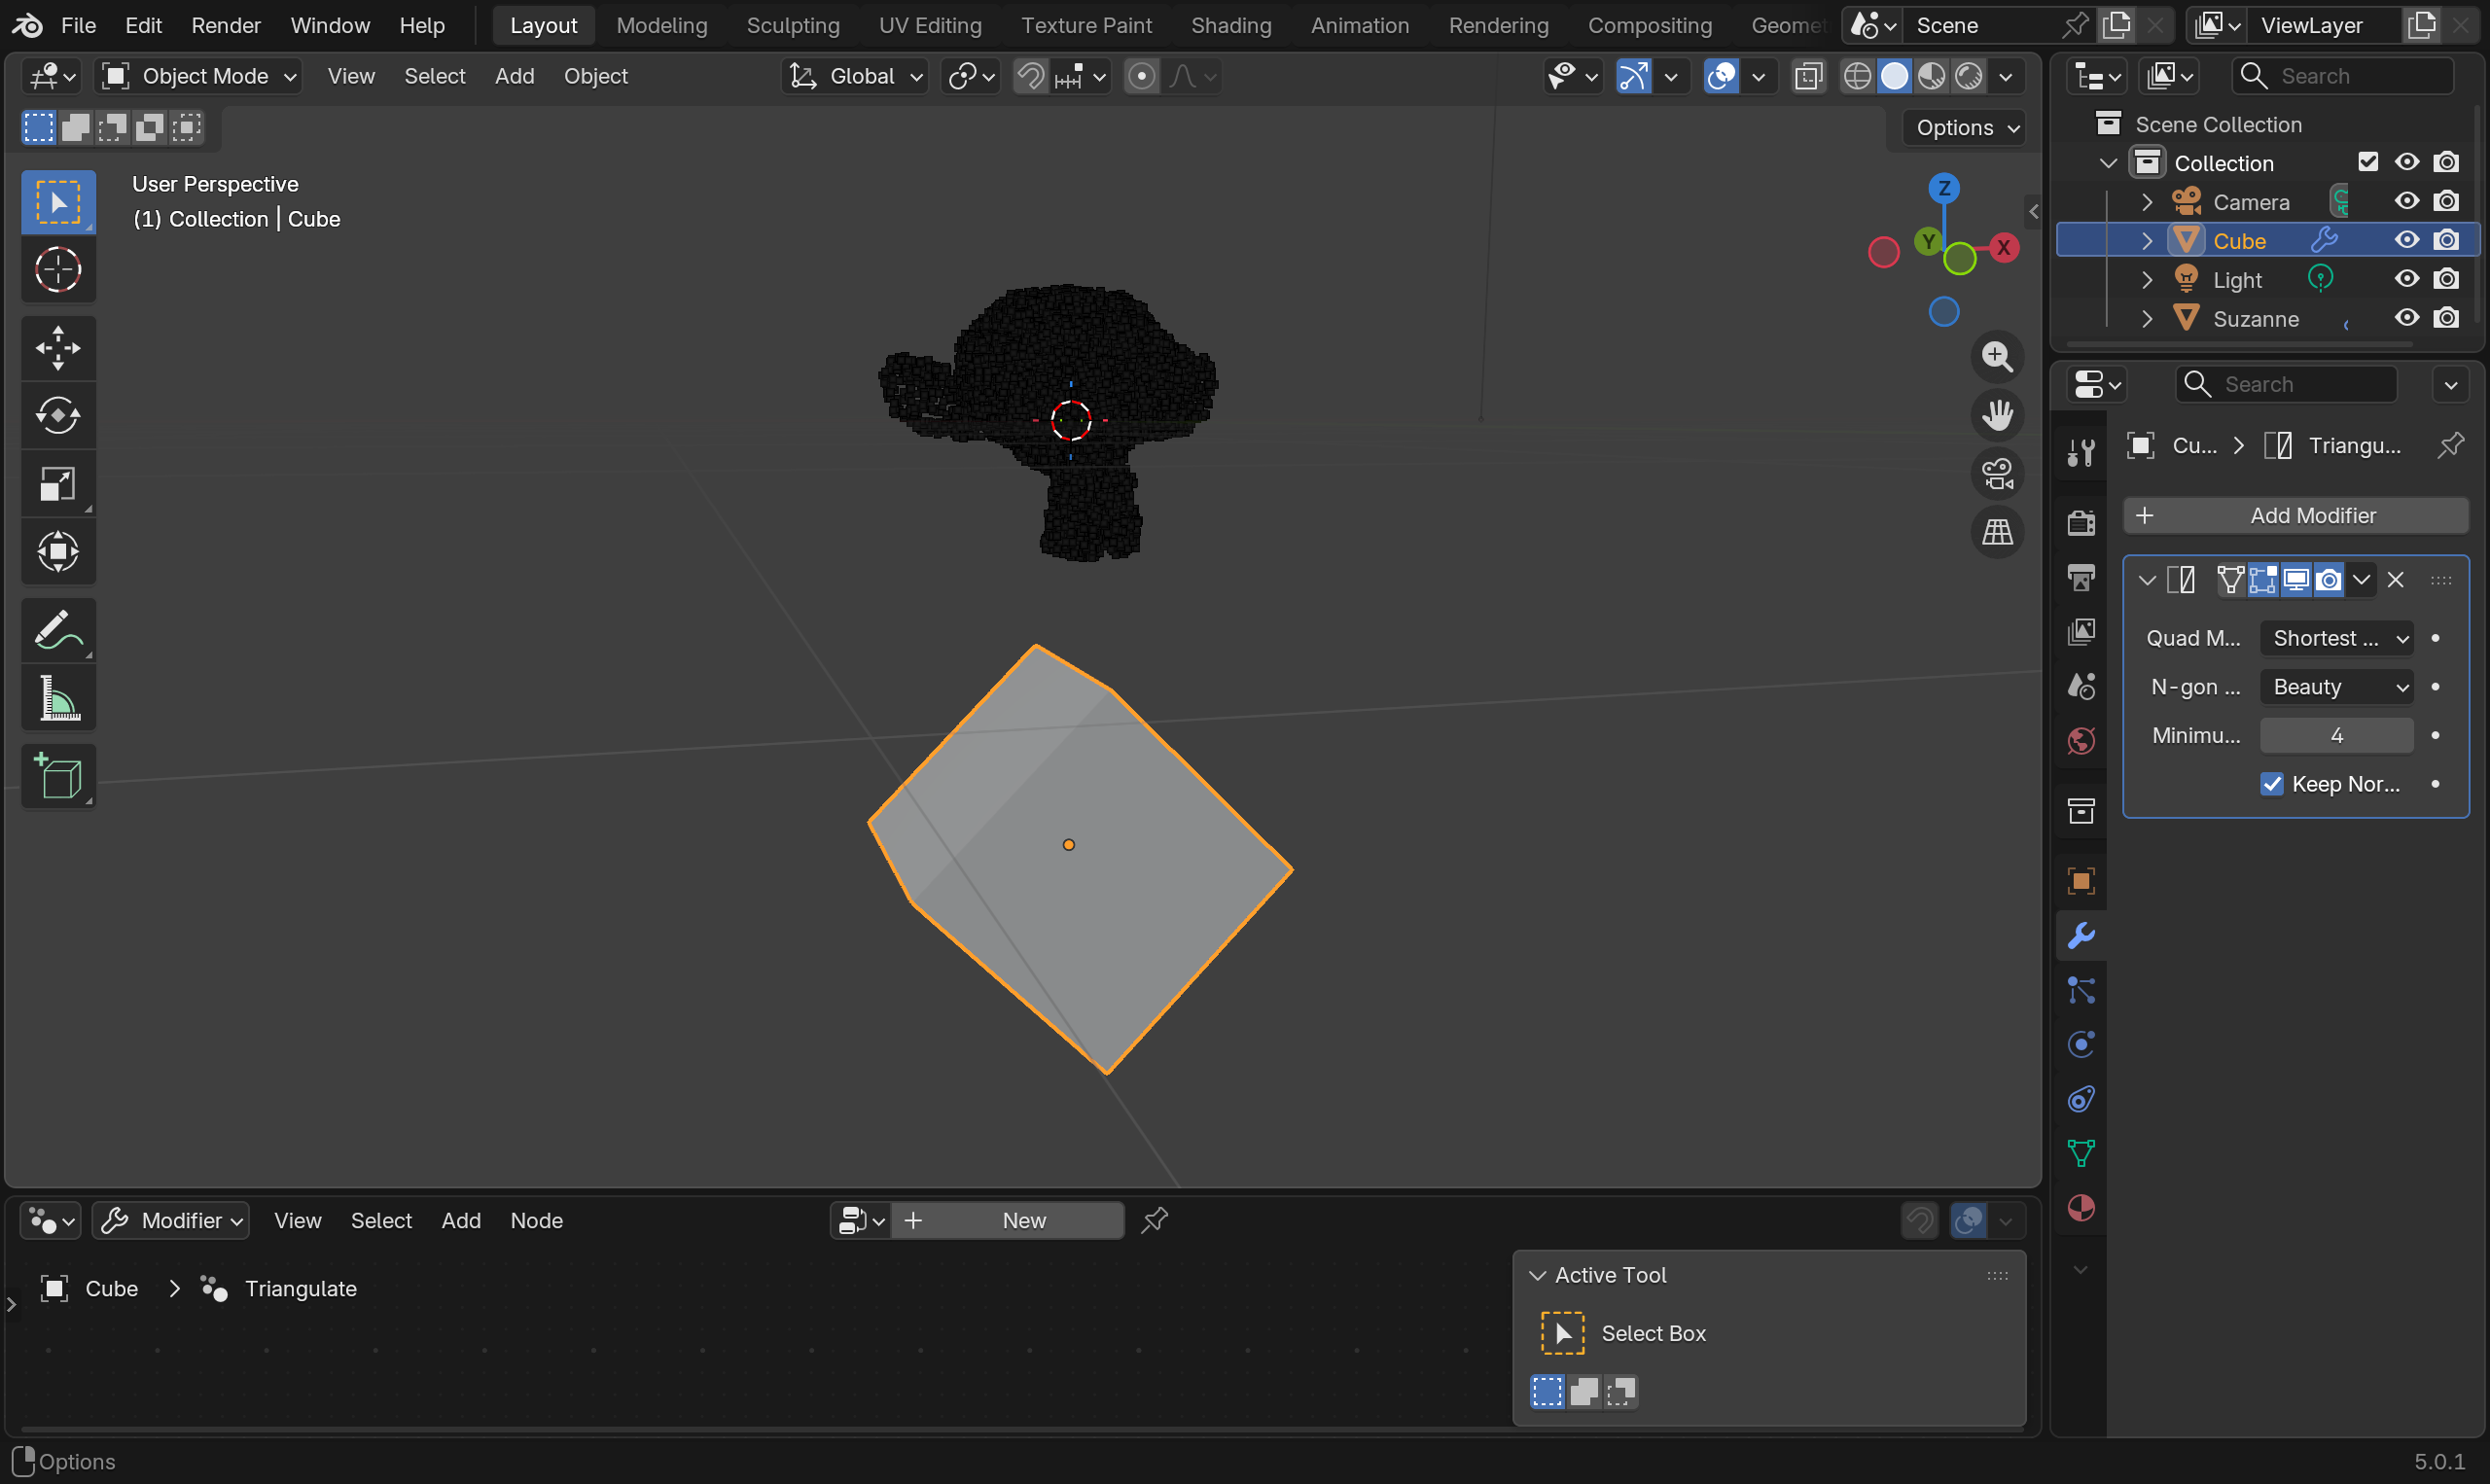
Create a cube, rotate it and move it under the snow.
-
Add a Triangulate modifier and check the Keep Normals.
-
Add a ground plane under everything. Triangulate it as well
Step 3: Setup HiPhy#
-
Create an empty plane axis, rename it solver, goto the physics panel, turn on HiPhy, select MPM Solver
-
Change the Grid Cell Size parameter on the solver to 0.25.
MPM Grid Cell Size
For MPM simulation, the ideal grid cell size, is that each grid captures roughly 8 particles. Increase grid resolution alone or particle counts alone won't result in higher quality simulations. Rather on the contraries, they will introduce a lot artifacts. If user forget to set the Grid Cell Size here, the simulation result will be noticeable volume lost, due to the empty cells without any particles in them. To increase simulation quality, user will need to increase grid resolution and particle counts in tandem. It is worth noting that they have a cubic relationship. If you reduce the grid size by half, you will need to increase the particle count by a factor of 8 (2 * 2 * 2).
-
Select the cube, goto the physics panel, turn on HiPhy, select Collider. Choose the solver object for the Solver parameter.
-
Repeat the previous step for the floor plane.
-
Select the meshless_particles object, duplicate it, and name the new object to meshless_particles.driven.
-
Goto the meshless_particles.driven's modifier tab, and apply the geometry node that was used to convert the mesh to a point cloud.
HiPhyEngine and Modifier Stack
Given the Blender python API limitation, HiPhyEngine can not apply deformation over the existing modifier stack, therefore, modifiers that change the vertices (such as the geometry node here) will lead to errors for HiPhyEngine. To circumvent this limitation, HiPhyEngine introduces the driven shape, user can manually bake down the modifier stack to a driven shape, and the simulation deformation will be applied to driven shape while the original mesh can retain it's modifier stack.
-
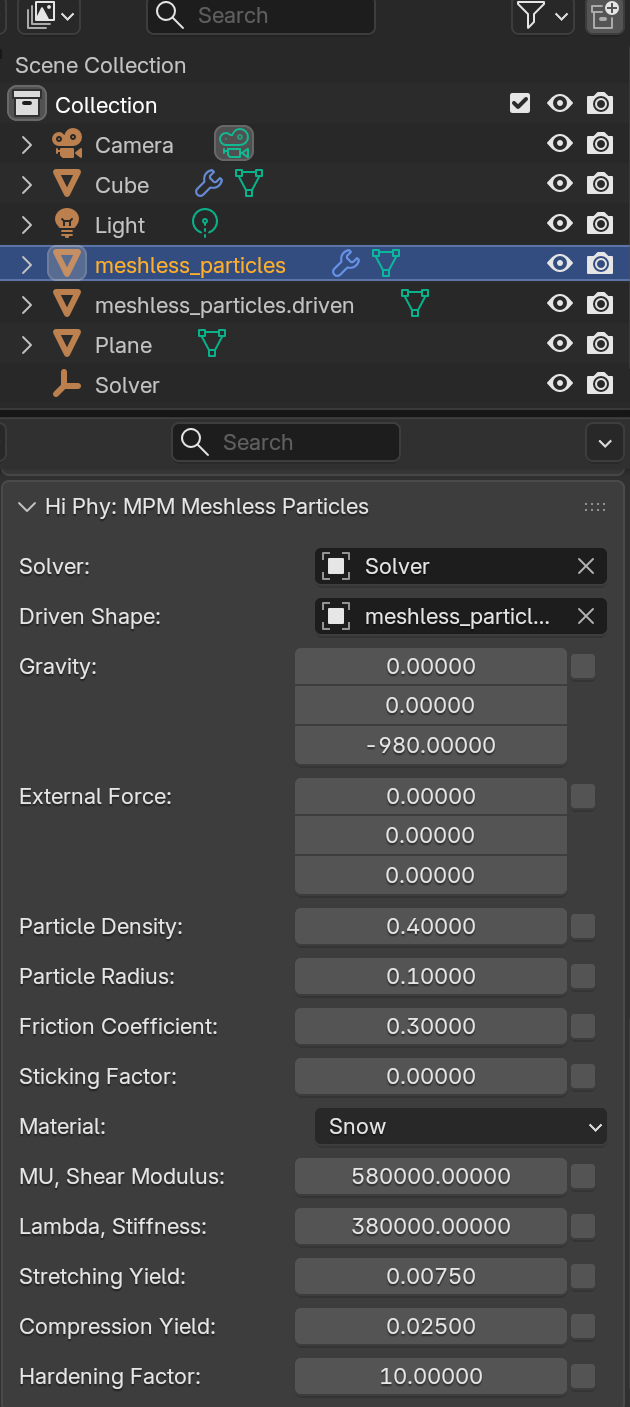
Select the meshless_particles object, turn on HiPhy, select MPM Meshless Particles.
-
Choose the solver object for the Solver parameter.
-
Choose meshless_particles.driven for the Driven Shape parameter.
-
Change gravity to (0, 0, -980) (if you are working with z-up).
- (Optional) Goto solver objects' HiPhy settings, uncheck Simulate In Memory
Simulate In Memory
The simulation cache can be very large. When Simulate In Memory is unchecked, the frames that is not used will be offloaded onto the disk to reduce memory footprint. Be sure you set the Cache File some where you can find, in case you want to delete the cache files later!
That's it! Click Run Simulation on the solver node, you will see the result!
The default surface parameter is very smooth, user can play with friction and sticky factors on the colliders and particles to get more interesting results. User can also animate the colliders to see if you can get it to move the snows around!
Step 4: (Optional) Setup Rendering#
- Create a geometry node on the meshless_particles.driven with the following connection: Points To Volume->Volume Mesh->Set Material->Set Shade Smooth.

- The following is a very simple snow shade can be used for the scene.

Step 5: (Optional) Material Maps#
HiPhyEngine supports fully animated maps. However, because of Blender's Python API limitations it is enabled using attributes. User can enable properties maps by check the checkbox next to each property, and enters the corresponding attribute. As an example:
To make the snow looks more natural, user can use geometry node to create a randomized the snow simulation parameters attribute, then assign it to the meshless particles. We will leave this excise to the users.
For more on the snow simulation parameters, checks out this